Introduction: Airtable as a CRM
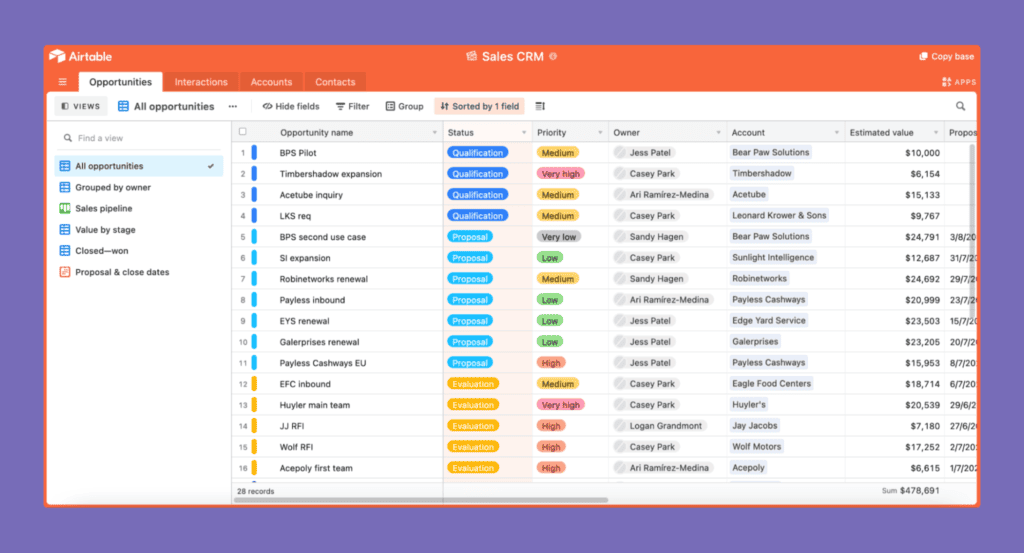
Are you looking for an efficient way to manage your customer relationships without getting lost in a jungle of complex software? You are in the right place! In this article, we’ll look at using Airtable as a CRM (Customer Relationship Management) tool.
Why Airtable, you ask? Well, it’s simple: it’s easy to learn, flexible and super-intuitive. It allows you to develop a CRM based on the challenges and desires of salespeople, rather than on the management challenges of managers – and that makes all the difference!
Together, we’ll take a look at its strengths and limitations, before diving into a step-by-step guide to setting up your CRM. Ready to go? So let’s get going!
Introducing Airtable :
Imagine a tool that is both a spreadsheet and a database, as if Excel and Access had had a child prodigy. Well, it’s Airtable! Its user-friendly interface and customization options make it a first-rate choice for customer relationship management.
- Airtable’s strengths as a CRM :
- Pleasant, intuitive interface: You know how frustrating it is when you can’t find what you’re looking for in software? Well, with Airtable, forget it! The interface is so intuitive and UX-centric that you’ll feel like a fish in water.
- Flexible CRM: Bring all your databases together in one place, and let them interact with each other.
- Large number of connectors: Airtable is the captain of the tool team. It integrates easily with apps like Slack, Miro and Typeform, allowing you to centralize your data and make your workflows smoother. All in one” has never been so important.
- Automation: Who doesn’t like it when things get done by themselves? Airtable’s automation features allow you to focus on what really matters to your business: communicating with your prospects and customers.
Using Airtable as a CRM
Now it’s time to get practical. I’m going to show you how to create your free CRM with Airtable, step by step, as if you were right there with me.
Step 1: Create the database
When you open Airtable for the first time, you’ll see a green button labeled “Add a database”. Click on it and you’ll see a “Start from scratch” option. Click on it and give your database a name – say, “My Super CRM”. Click on “Create”. You now have your own database ready to fill!
Step 2: Create tables
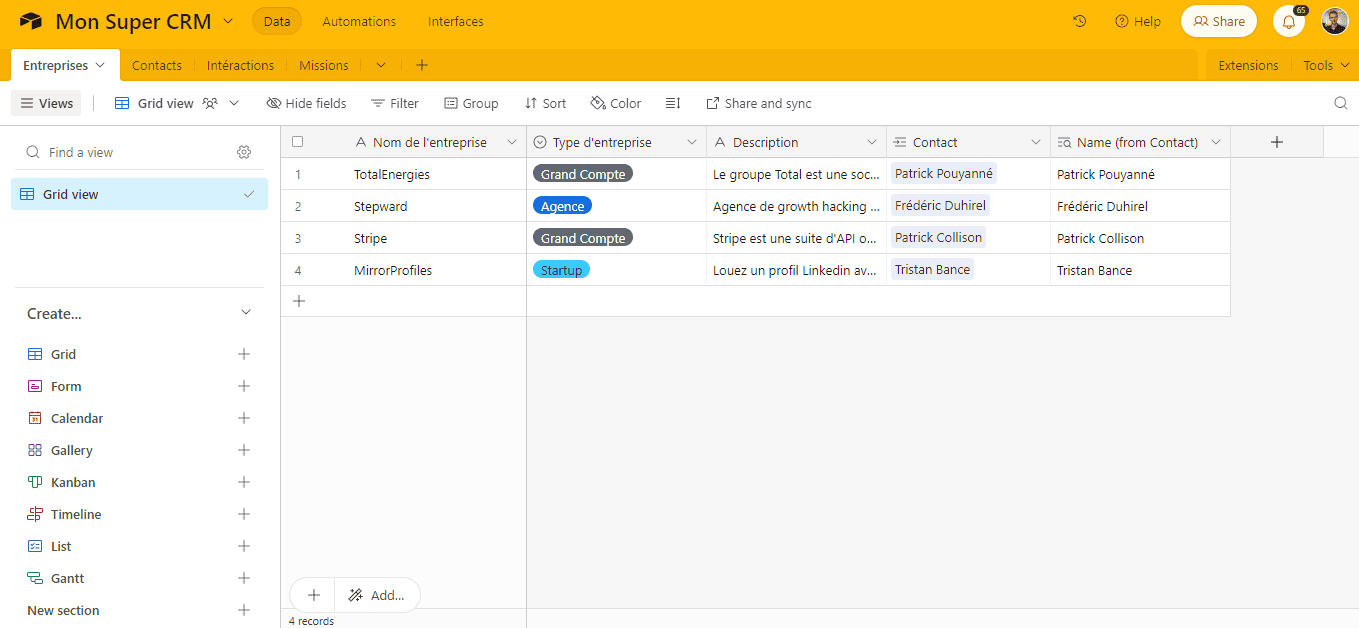
On your new database screen, you’ll see a “+ Add table” button. Click on it to create your first table. Name this table “Companies”.
On the “Companies” table, you’ll see a series of columns called “Field 1”, “Field 2”, etc. For each field, you can rename it and define its data type. For example, for the first field, rename it “Company name” and set the data type to “Text”.
Add other fields such as “Type of business”, “Address”, “Description” and “Contacts” as required.
Repeat this process to create other necessary tables, e.g. “Contacts”, “Interactions”, “Missions”.
Step 3: Cross-reference tables
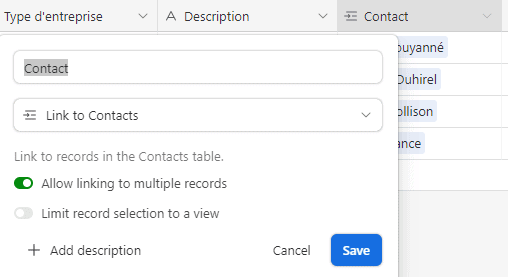
We’re now going to link the tables together. To do this, we’ll create a new field in the “Companies” table, which we’ll call “Contacts”. Change the field type to “Link to another record”, then select the “Contacts” table.
This means that every time you add a company to your CRM, you can add a contact from the “Contacts” table associated with that company.
Repeat this process for all the necessary links between your tables.
Step 4: Customize your CRM by adding views
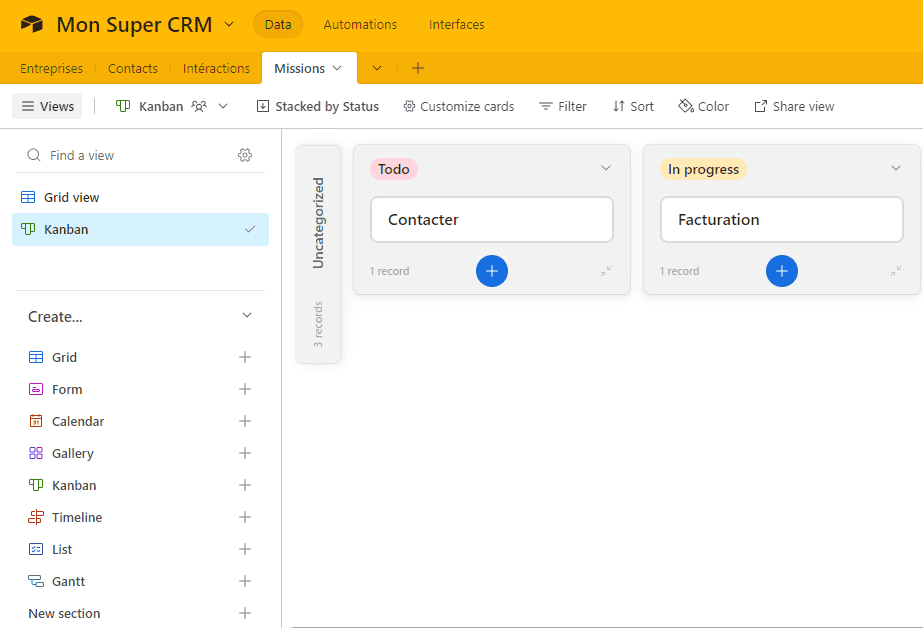
The final step is to personalize your CRM. To do this, we’re going to create different “views”. In the “Missions” table, for example, click on “Grid view” at top left, then on “+ Add view”.
Choose “Kanban” and name your view – say, “Mission View”. Select “Status” as your Kanban field. You now have a Kanban view that lets you easily visualize and manage the status of each mission!
You can add as many views as you like to suit your specific needs.
And now your CRM on Airtable is ready! Remember that these steps are flexible and you can adapt them to best suit your specific needs. So feel free to experiment and customize your CRM. Good luck!
A practical application with Qualiretraite :
Imagine yourself in front of a huge pile of post-it notes. Each one represents a lead to contact or follow-up. Hard to find your way around, isn’t it? Well, that’s what we helped solve for Qualiretraite. After a short brainstorming session, we designed a dynamic database.
A sort of giant digital post-it note, but much neater. Every day, the telemarketer has a clear vision of her action plan, thanks to the list of features at her fingertips:
- Automatically updates the daily calls view, and can launch them with a single click. It’s like having a personal assistant prepare your work for the day.
- You only need to fill in two fields: lead status and comments. It’s a bit like ticking a box on a to-do list.
- Automatically add leads wishing to be called back later to your calendar. Like a reminder on your phone, but with more detail.
- She can choose an email template pre-filled with lead information. No need to type the same information over and over again.
- Automatic dispatch of an email with lead details to the relevant advisor. An effective way of keeping everyone in the loop.
If you’d like to find out more about this particular case study, please read our Qualiretraite use case.
Need a little help with Airtable? Call on our expert Tristan
Need more expertise to exploit Airtable’s full potential? Don’t worry, Tristan is here to help. He’ll analyze your needs and design the perfect solution for you. Whether you’re looking to customize your CRM, integrate third-party applications, create advanced automation or improve your workflow, Tristan can help you achieve your goals. So don’t hesitate to contact us to benefit from Stepward’s expertise.
Conclusion:
Airtable is like a toolbox for managing your data. Its user-friendly interface and flexibility make it an attractive choice for freelancers and small businesses looking to manage a personalized CRM. But, like any toolbox, it has its limits. There are data volume and API limits. That’s why our tutorial is here to help you navigate through these challenges and use Airtable effectively. Remember, every tool has its potential, you just need to know how to use it wisely.


